
What to expect
You the user design first and make your layout changes on each wanted breakpoint. After that you can add your triggers for the object or elements your want to scroll in or out, while the user views your website.
What is in the package
This widgets comes with the following mucow items: - Scroll Animation IN options - Scroll Animation OUT options - ALL INITIAL Library. (required only once for all xmuse.it widgets.)
How does it work
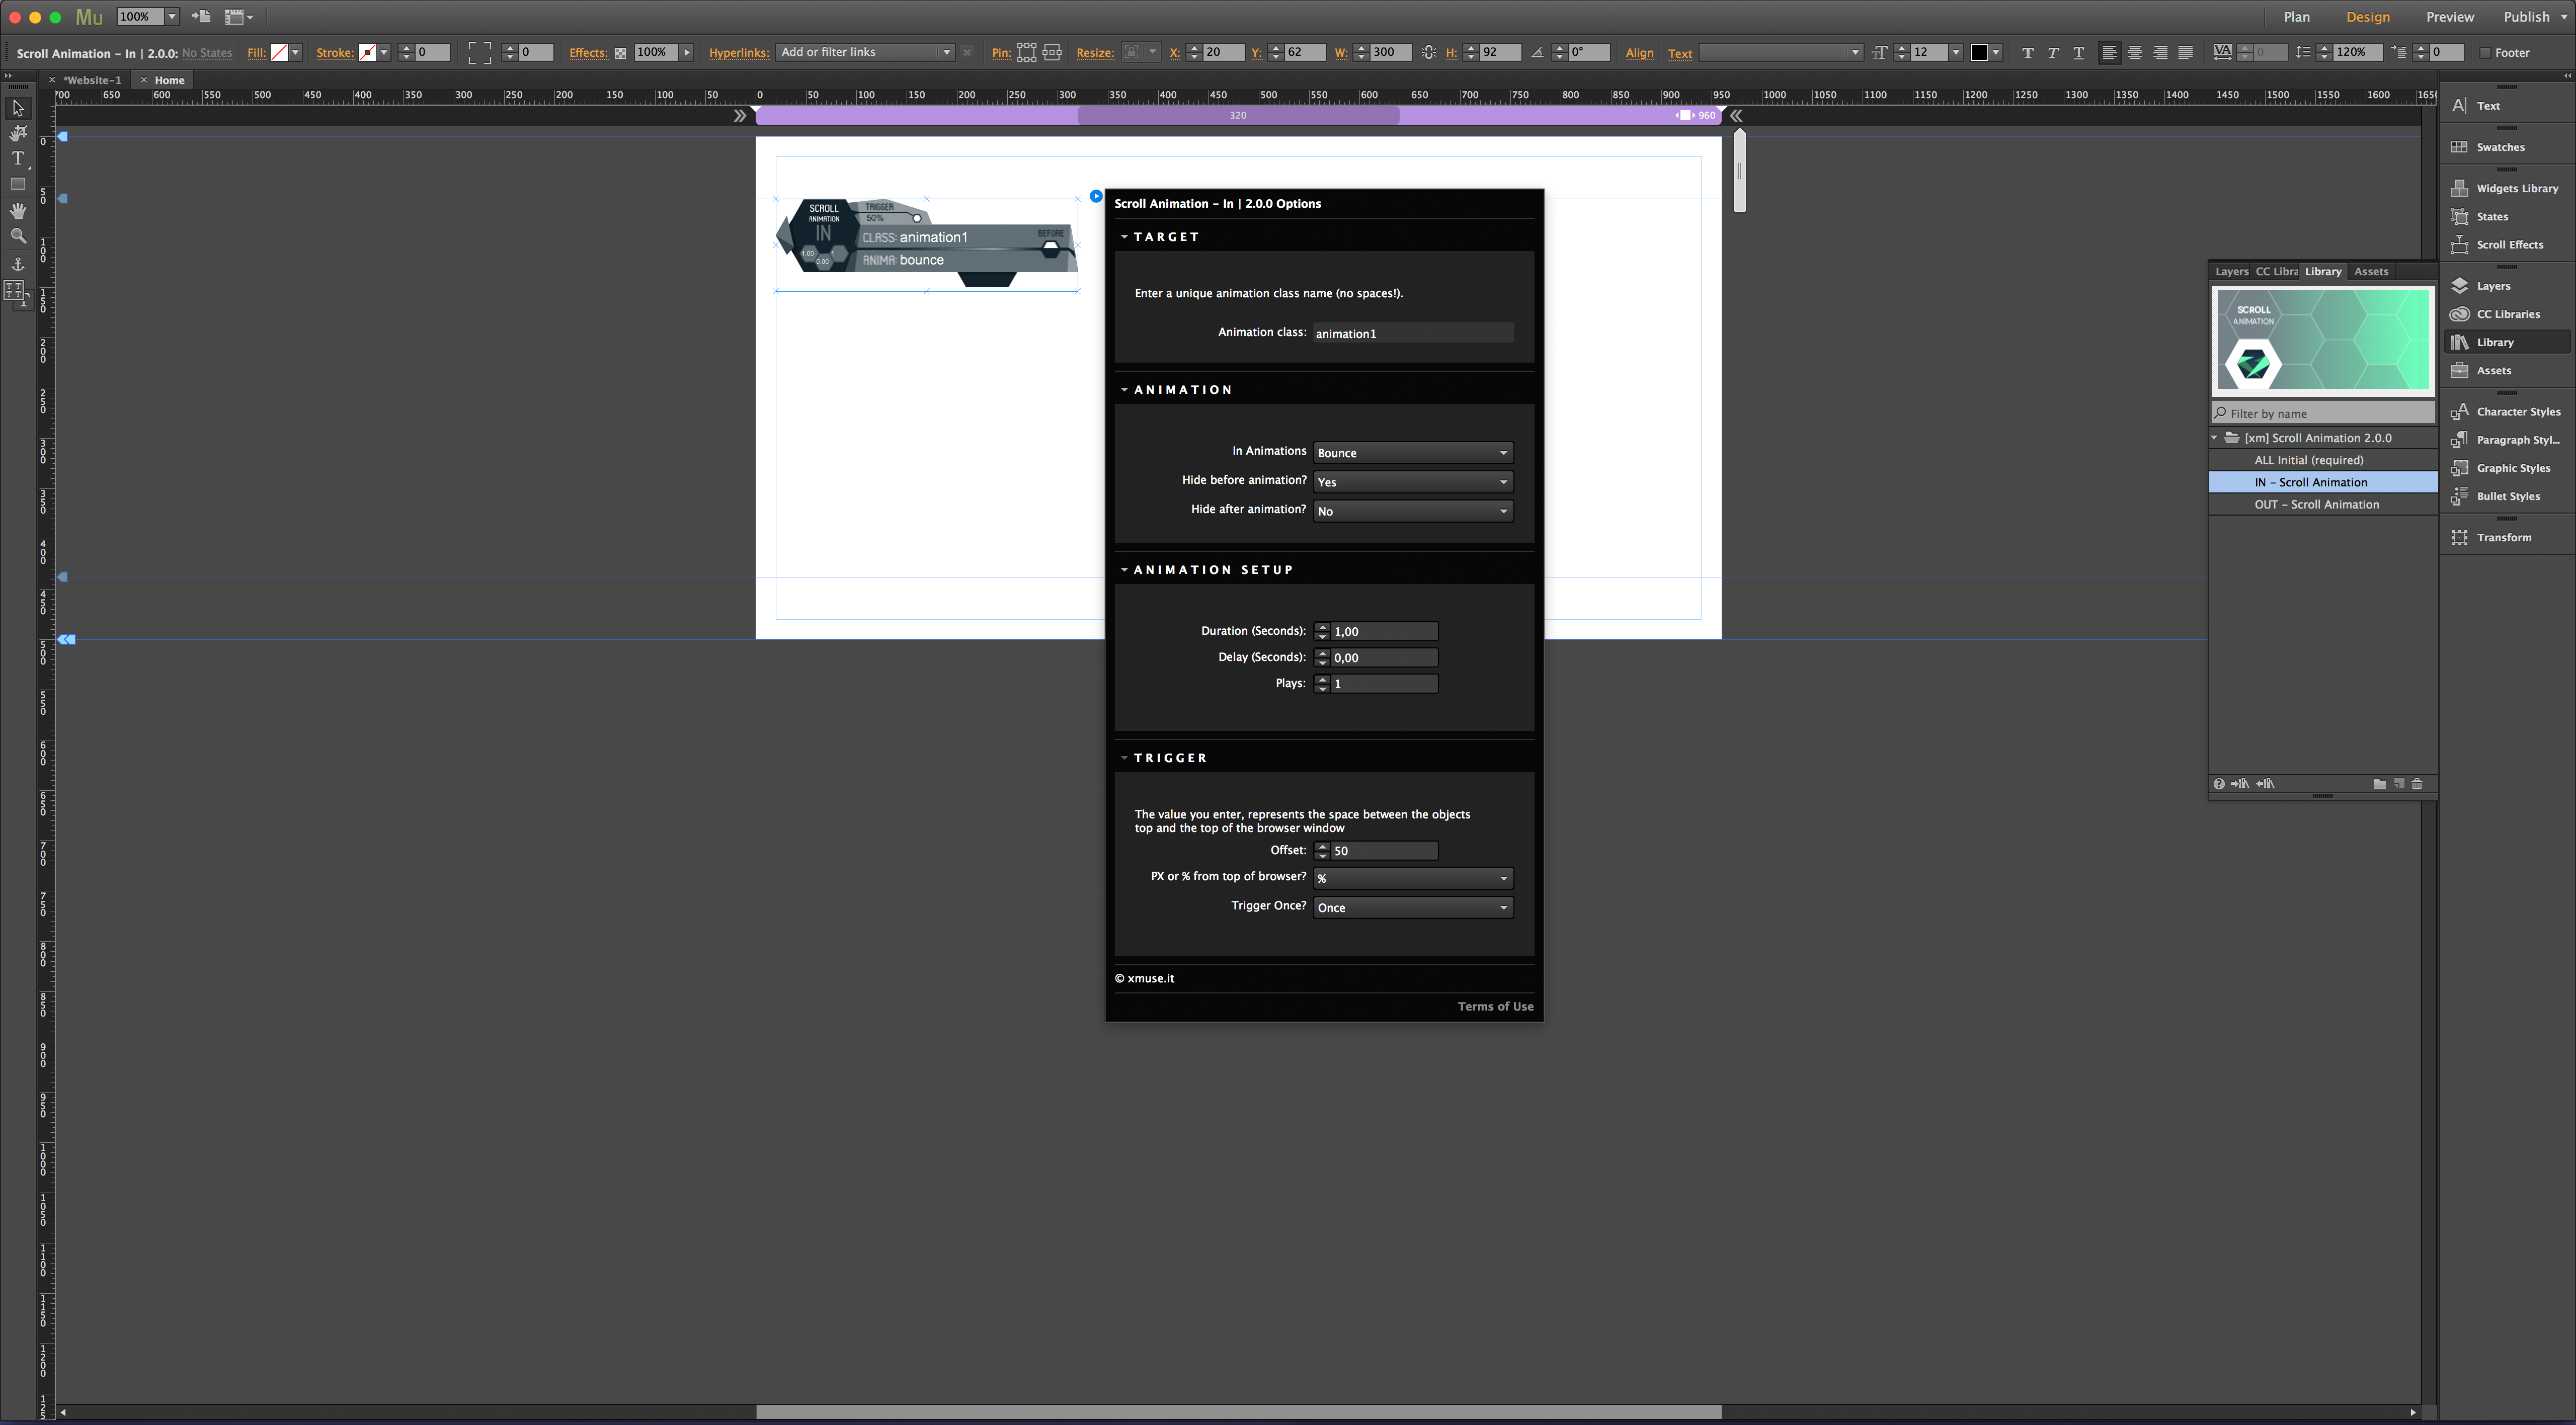
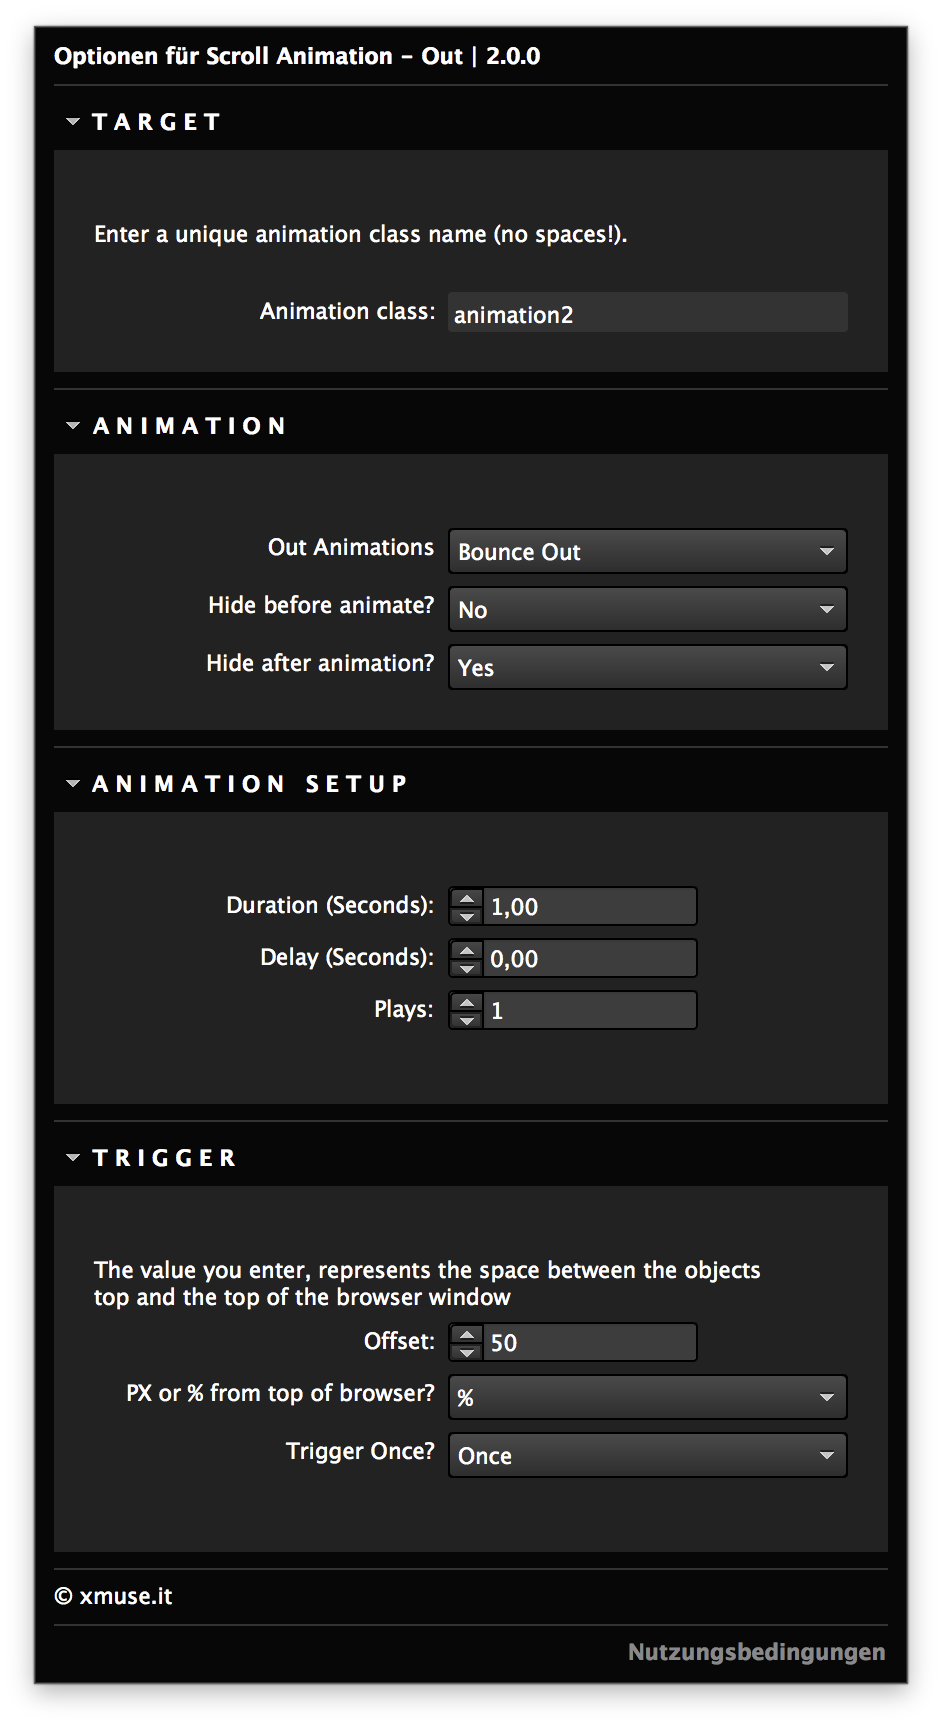
Use any HTML <tag> or CSS .class, #id on your designed page and select it with Scroll Animations Target setting. Here are a few examples:
- html – The html tag is the main tag of your page. Select this and make it animate
- h1 or p – Select this tag to make all your headlines and text move on different triggers.
- #ul123 – This generated CSS IDs generated by the Muse code.
- .button – Select this CSS class to make a lovely mouseover.
The basic way to start would be creating a Target class (selector) name in any of the Muse style panels. This can be the Character, Paragraph or Graphic Panel. Make sure you name your elements in a logical way. Here are a few examples:
- logo_big (your logo at the top of the page)
- s1_sl1 (reads Section 1 and Subline 1)
- s3_btn_sale (reads Section 3, sale button trigger)
Once your Target class names are set you can add these names inside the widgets inputfields. Always with a dot and multiple with a comma (eg. .logo_big, .s3_btn_sale). Please no spaces>/strong> in the Target class names.
Scroll Animation uses lesser options then Event Animation. But if one uses mutliple scroll widgets it is possible to make building up story very intersting. Use a flowchart to keep track of your ideas.
- Target class: select your element to animate
- Animation/Visibility: Choose an animation and set its visibility
- Trigger setting: Set the trigger when your object should become visible or hide. (IN/OUT)
- Timing setting: Set the timing of your needed animation
There are trigger settings. You can choose between % or px trigger settings. A Hide before or hide after option. Also animation duration, delay and repeat options.
How to install
Adding your widgets to the Muse library.
- Unzip the file. Double click on your .mulib file to automactily import the widget inside the Library of Adobe Muse.
- Inside of muse, locate the Library panel (select window > library). There you will find on the bottom left an import button. Click on this and locate the .mulib file and import.
Rejoice you are all set. Enjoy yourself with this newly and innovative product. We hope it brings you as much fun as it has done for us. And don’t forget more to come on the animation front soon.